
Installing a backup camera is one of the smartest upgrades we can add to any vehicle today. With increasing traffic, tight parking spots, and rising safety standards, drivers now rely on visual assistance more than ever.
In this guide, we present a complete, professional breakdown of the installation process, essential tools, wiring steps, testing procedures, and expert tips for long-lasting performance.
You can get all the latest information and new, improved backup camera systems at TadiBrothers. Our goal is to help you build a clean, efficient, and reliable setup that works flawlessly every time you shift into reverse.
Understanding the Importance of a Backup Camera System
A properly executed car backup camera, which is installed properly, can significantly reduce blind spots and enhance situational awareness.
A real-time view of what’s behind the vehicle significantly reduces the likelihood of rear-end collisions, driveway accidents, and parking mishaps.
A well-installed camera improves precision, minimizes risk, and provides the clarity needed in low-visibility environments.
Choosing the Right Backup Camera for Your Vehicle
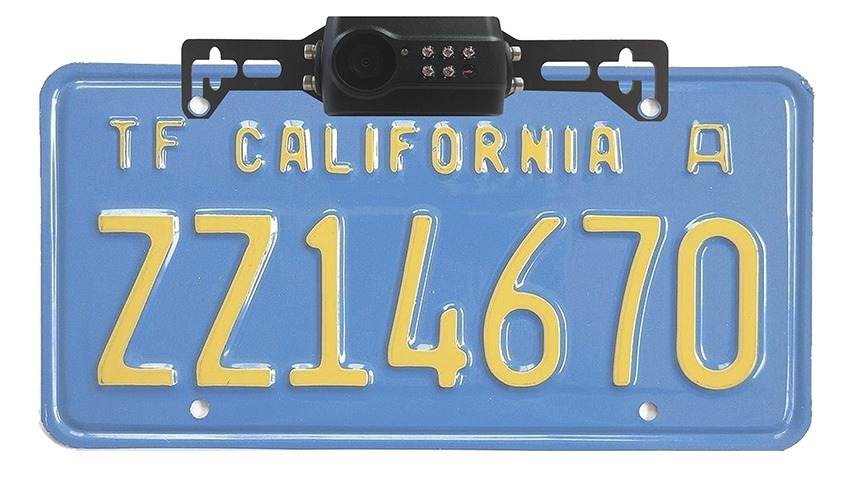
Alt text: Digital wireless 1080P license plate backup camera with clip-on mirror, showing the camera mounted on a license plate.
Selecting the correct camera ensures compatibility, clarity, and long-term durability. We evaluate several key factors to match users with the best option:
Camera Types
- License Plate Cameras – Simple mounting, popular for sedans and SUVs.
- Flush-Mount Cameras – Clean factories look for drivers who prefer minimal visibility.
- Bracket Cameras – Best for trucks, vans, and commercial vehicles.
- Wireless Cameras – Faster setup, ideal for vehicles where wiring is difficult.
Features to Consider
- High dynamic range for harsh lighting conditions
- Waterproof and dustproof housing
- Wide viewing angle for complete rear visibility
- Night-vision LEDs or infrared capability
- Parking guidelines for easier maneuvering
Matching these features ensures the backup camera installation delivers optimal performance across all driving conditions.
Tools Required for a Clean and Professional Installation
A smooth installation requires proper equipment. Preparing these tools in advance avoids interruptions and ensures consistency:
- Trim removal kit
- Electrical tape and connectors
- Screwdrivers and drill bits
- Power tester or multimeter
- Wire crimper and stripper
- Zip ties for cable management
- Fuse taps for safer power routing.
- Heat shrink tubing for long-term wiring protection
With these tools, we maintain precision and prevent electrical issues during and after the installation, and you can rely on trained professionals who ensure everything is set up safely and correctly.
Step-by-Step Guide to Installing a Car Backup Camera
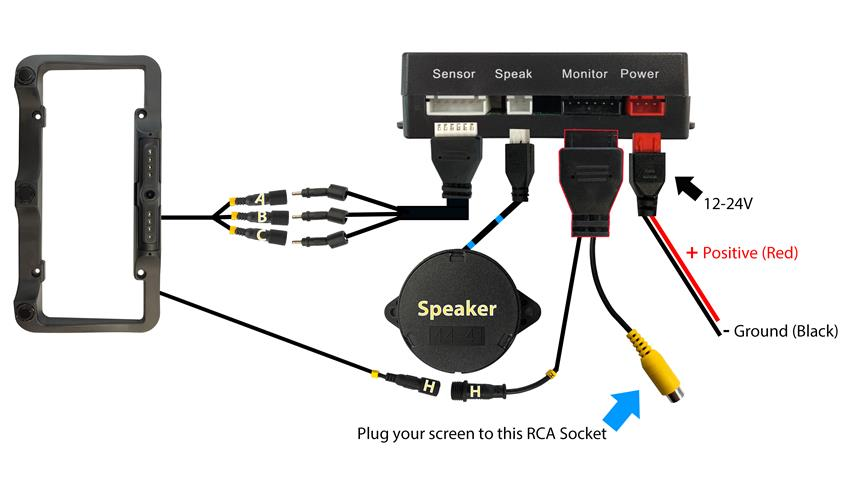
Alt Text: Step-by-step car backup camera installation wiring setup showing power, plugs, RCA Socket.
The following section outlines a complete, technician-level process for car backup camera installation. These steps ensure a secure fit, proper alignment, and uninterrupted video transmission.
1. Preparing the Vehicle
We begin by safely disconnecting the battery to avoid electrical damage. Next, we remove the trunk or tailgate panels using trim tools. This exposes the wiring area and allows clean routing of cables.
2. Mounting the Camera
After selecting the mounting style, we position the camera in the most strategic location, typically above the license plate or centered within the bumper.
Key considerations include:
- Keeping the lens level for accurate parking lines
- Ensuring the camera is tightly sealed against water
- Checking rear visibility coverage before final tightening
Once aligned, we secure it using screws or adhesive brackets, ensuring a vibration-free mount.
3. Routing the Video and Power Cables
This is one of the most critical steps. We run the video cable from the rear of the vehicle to the dashboard while protecting it from heat, moving parts, and pinch points.
Clean routing involves:
- Passing wires through factory grommets
- Tucking wires behind panels
- Avoiding interference sources like power modules
- Using zip ties for a tidy finish
By following factory pathways, the installation remains discreet and long-lasting.
4. Connecting to the Reverse Light Power Source
For most systems, the camera activates only when the vehicle is shifted into reverse. We identify the positive reverse light wire using a multimeter, then connect the camera’s power line.
We secure all splices using:
- Crimp connectors
- Soldering (optional for added integrity)
- Heat shrink tubing for moisture resistance
This guarantees reliable power delivery and instant activation.
5. Integrating the Camera With the Display
Most modern vehicles come with integrated infotainment screens, while older models require a standalone monitor or rearview mirror display.
Connections vary:
- RCA video cable input for aftermarket screens
- OEM interface modules for factory displays
- Wireless receivers for cameras without long cables
We also optimize brightness, guidelines, and angle calibration by configuring the display settings.
6. Final Testing and Adjustment
Once connections are complete, we reconnect the battery and shift into reverse to test the image. Key adjustments include
- Correcting tilt or misalignment
- Ensuring visibility in both bright and dark areas
- Testing waterproofing and stability
- Checking parking guidelines accuracy.
- Ensuring instant activation with no delay
A flawless car backup camera installation provides a clear, stable image in all conditions.
Troubleshooting Common Backup Camera Issues
Even professional setups may require fine-tuning. The most common problems include:
- Flickering Image – Usually due to loose grounding or weak power supply
- Blue or Black Screen – Often caused by incorrect input selection or faulty video cable
- Static Interference – Occurs when wires run too close to high-power electronics
- Delayed Activation – Can result from wiring mismatches or slow infotainment boot times
- Foggy or Blurry View – Related to condensation or poor lens sealing.
We address each issue by tracing wiring continuity, verifying power flow, and performing camera lens inspections.
Expert Tips for a Cleaner and More Reliable Installation
Implementing professional finishing techniques ensures durability and aesthetic quality:
- Use heat shrink over all connections
- Keep wiring away from hinges and sharp metal edges.
- Angle the camera slightly downward for optimal parking line displays.
- Apply anti-corrosion spray where wires meet metal
- Choose high-grade video cables for maximum clarity.
- Avoid over-tightening screws when mounting on plastic components.
These refinements guarantee a long-lasting, stable system.
Maintenance Tips for Long-Term Camera Performance
A properly cared-for system provides years of reliable use. We recommend:
- Cleaning the lens weekly with microfiber cloth
- Inspecting wiring annually for wear
- Checking for moisture intrusion during rainy seasons
- Updating display firmware if using a digital monitor
- Ensuring the camera housing remains free of dirt buildup
Consistent maintenance ensures your backup camera system remains sharp and dependable.
Final Thoughts
A well-executed installation of a backup camera improves both safety and driving convenience. By choosing high-quality equipment, routing cables cleanly, and performing precise alignment, we create a system that delivers clarity, accuracy, and durability.
Whether upgrading an older vehicle or enhancing a new one, this installation offers a sophisticated layer of protection and confidence every time you reverse.