
The best Wired Backup Camera Systems should match your RV’s size and driving needs. Look for clear video, night vision, wide angles, and a compatible monitor. A wired connection provides stable video without wireless signal interference.
Imagine backing into a narrow campsite with trees on both sides. Your mirrors show the corners, but what about obstacles behind your bumper? A well-placed camera helps you spot hidden objects before moving closer.
Smaller RVs may only need a single rear camera for parking. Larger motorhomes often benefit from side cameras and split-screen monitors.
Before buying, check the resolution, cable length, weather protection, and installation needs. These features help you choose wisely without paying for unnecessary extras.
1. Is a Wired RV Backup Camera Better Than Wireless?
A wired camera sends video through a cable to your screen. This direct link helps keep the picture stable. You won’t face the same wireless signal issues during travel.
Wireless cameras are easier to fit on many RVs. You don’t need a long video cable between both ends. However, wireless reception can vary with distance and nearby interference.
Both types still need power. The main difference is how they send video.
| Wired camera | Wireless camera |
| Stable video connection | Signal quality can vary |
| Needs video cable routing | No long video cable |
| Good for permanent setups | Good for simpler installations |
| More installation work | Often quicker to install |
Choose wired when steady video matters more than easy setup. Wireless may suit you when cable routing looks too hard. Neither option removes the need for safe driving checks.
2. Match the Camera System to Your RV Type
A small campervan and a large motorhome need different views. Your RV’s length matters, but its blind spots matter more. Start by checking what your mirrors cannot show. Imagine turning a long motorhome into a narrow campground lane. Your rear camera shows what’s behind you. But side cameras may help you watch nearby posts and trees.
Here’s a simple starting point for different RVs.
| RV type | Camera setup to consider |
| Campervan | One rear camera |
| Travel trailer | Rear camera with quick disconnect |
| Fifth wheel | Rear camera with optional hitch view |
| Large motorhome | Rear and two side cameras |
| Luxury RV | Multi-camera split-screen system |
These are starting choices, not fixed rules. Some small RVs have large blind spots, too. Choose extra cameras only when they cover areas you can’t see.
3. Six Features That Matter in a Wired RV Backup Camera
Camera features can look confusing when you compare product pages. Some numbers sound useful but tell only part of the story. Focus on what makes the image clear and easy to use.
1. Image quality and resolution
Look for a sharp picture that shows nearby objects clearly. A 1080p camera may offer more detail than a basic model. But your screen must support its video format.
AHD means Analog High Definition. It allows compatible systems to carry HD video through cables. Check both the camera and monitor before choosing AHD.
2. Viewing angle
A wide lens helps you see more space behind your RV. Around 120 degrees can be a useful starting point. But very wide views may distort distance near the edges.
3. Night vision
You may reach your campsite well after sunset. Infrared night vision can help you see nearby objects. Check actual night footage, not just the product label.
4. Weather protection
Your rear camera faces rain, dust, and road spray. Check its stated waterproof rating and housing design. Protected cable joints matter just as much.
5. Monitor size
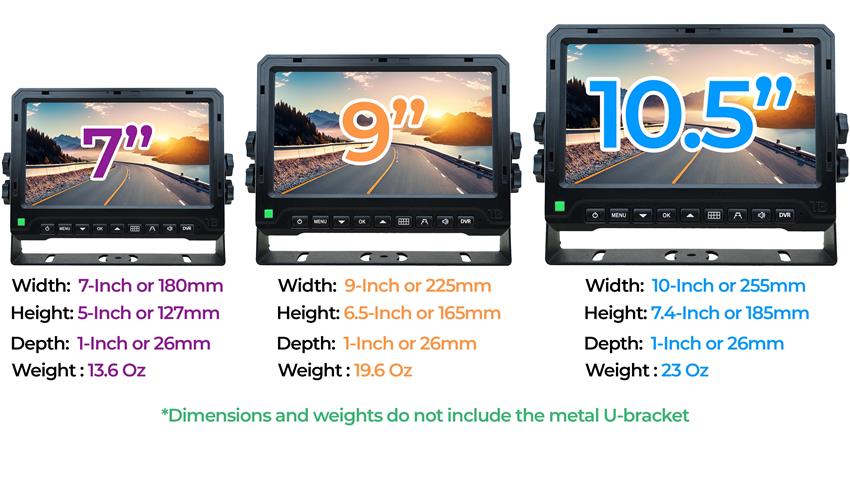
A seven-inch screen works well for many RV cabins. Larger screens may help with several camera views. Place the screen where you can glance at it safely.
6. Camera sensor
You’ll see CCD and CMOS sensors listed on some products. Both can give a useful picture. Judge the sample image rather than choosing by sensor name alone.
You can compare these features across TadiBrothers’ Wired Backup Camera Systems. Check each model’s specifications before making your choice.
4. Check Cable Length, Connectors, and Compatibility
Your RV’s length isn’t the same as its cable path. A 30-foot RV may need more than 30 feet of cable. Wires must travel around corners, panels, and fixed parts.
Start measuring from the camera’s planned mounting spot. Follow the path toward your screen, then allow extra length. Avoid hot areas, sharp edges, and moving parts.
Travel trailers need one more check. The camera cable must connect safely to your tow vehicle. A suitable quick-disconnect cable makes hitching much easier.
Check these details before you order:
- Cable length: Measure the complete route before buying.
- Connectors: Match the correct plugs and pin layouts.
- Video format: Confirm the monitor supports your camera.
- Power: Check voltage needs and wiring instructions.
- Extensions: Use compatible cables for longer RVs.
Don’t assume an RV marked “camera ready” accepts every camera. Factory wiring and plugs can differ between brands. Ask the seller to confirm compatibility before you pay.
5. Should You Choose One Camera or Multiple Cameras?
One rear camera can solve your biggest parking problem. It helps you see posts, curbs, and other rear obstacles. For smaller campers, that may be enough.
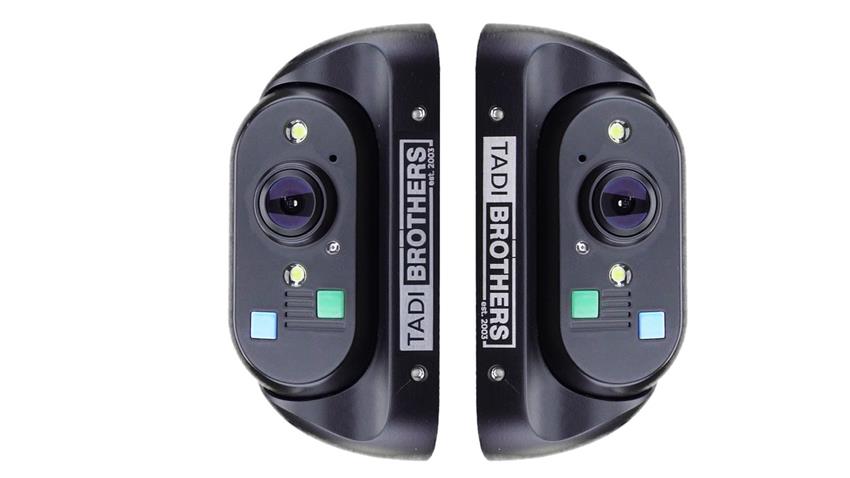
Larger RVs can benefit from two side cameras. These help you check nearby space during slow turns. A split-screen monitor lets you watch several views together.
Think about your normal trips. Do you mainly go back into open campsites? Or do you often drive through narrow lanes?
If you need more coverage, browse TadiBrothers’ Wired Backup Camera Systems. You’ll find options with different camera counts and monitor layouts.
Remember that more cameras also mean more wiring. Make sure each added view solves a real problem.
6. Choose Between Reverse-Only and Full-Time Viewing
Some cameras turn on only when you shift into reverse. Others can stay on while you drive. The right choice depends on when you need the view.
Reverse-only viewing works well for basic parking needs. Full-time viewing can help you watch traffic behind your motorhome. It may also help you check a towed vehicle.
TadiBrothers offers systems that support both viewing modes. Your wiring setup determines how those modes work.
Check the power instructions before installation. Don’t connect the system to an unsuitable power source. A trained installer can help with more complex wiring.
7. How Much Does a Wired RV Backup Camera Cost?
Camera prices rise as you add screens and extra views. A basic rear system costs less than a multi-camera setup. Higher resolution and larger monitors may raise the price.
At the time of review, TadiBrothers listed these examples:
- Around $300: A basic RV rear camera and monitor kit.
- Around $600: A three-camera kit with a split-screen monitor.
- Around $900: A 1080p AHD three-camera system.
Prices can change with upgrades, sales, and stock. Check the latest price before buying.
Also, add the cost of cables and installation. Some RVs need more wiring than the standard kit provides. A cheaper camera isn’t a bargain if it doesn’t fit.
Pay for the features you will use most. Clear video and correct fit matter more than fancy extras.
8. Understand Installation Before You Buy
A good camera needs a good mounting spot. Mounting too high or low can hide useful detail. Test the view before drilling any holes.
A rear camera should show the area you need most. For parking, that often includes the ground near your RV. You may also want a view farther behind.
Plan the installation in this order:
- Choose a camera spot with a clear view.
- Measure the complete route for your cable.
- Check the correct power and ground connections.
- Secure cables away from moving parts.
- Seal new holes against water.
- Test every camera before your next trip.
Never drill until you know what’s behind the panel. Hidden wires and pipes can cause costly damage. Get professional help when routing or wiring feels unclear.
Once fitted, test the screen in an open space. Place a visible marker behind your parked RV. Learn how its distance looks on the monitor.
9. Common Mistakes to Avoid When Buying
Most buying mistakes come from skipping small details. You may choose a great camera that doesn’t fit your setup. A few simple checks can prevent that problem.
Watch for these common mistakes:
- Buying the widest lens: Very wide views can distort distance.
- Ignoring monitor compatibility: Not every screen supports every format.
- Guessing cable length: Short cables can delay your installation.
- Skipping night tests: Daylight footage doesn’t show night performance.
- Choosing too many cameras: Extra views can add cost and clutter.
Also, check the return terms and warranty coverage. These matter when your RV has an unusual layout. Keep your receipts and installation details for future support.
10. Which TadiBrothers Wired RV Backup Camera Fits Your Needs?
TadiBrothers offers several setups for different driving needs. The best choice depends on your RV and budget. Start with the simplest kit that covers your blind spots.
Here are three options worth comparing.
For basic rear visibility
The RV Backup Camera with Rear View Monitor includes a seven-inch display. It supports reverse viewing and continuous rear observation. This makes it a starting point for simpler setups.
For better side coverage
The Rear-View System with Three Cameras includes one rear camera and two side cameras. Its split-screen monitor supports several viewing modes. Consider this setup when side blind spots concern you.
For higher video detail
The 1080p AHD Three-Camera System includes HD rear and side cameras. It also includes a compatible seven-inch split-screen monitor. This suits drivers who want clearer multi-camera video.
Compare the full kits before ordering. Check cables, mounting parts, and your vehicle’s wiring needs. Don’t assume every listed accessory comes with every version.
Make Every Parking Move Easier
The right wired RV backup camera should make your RV easier to handle. Choose clear video, correct wiring, and views that match your blind spots. Don’t let extra features distract you from those needs. Explore TadiBrothers’ Wired Backup Camera Systems to find a suitable setup. When your next campsite feels tight, will you have the view you need?
FAQs
Can You Install a Wired RV Backup Camera Yourself?
Yes, some RV owners can handle the installation. You’ll need basic wiring skills and safe cable access. If drilling or electrical work feels risky, hire a professional.
Do Wired RV Backup Cameras Work at Night?
Many models include infrared night vision for dark conditions. Still, fog, rain, and dirty lenses can reduce visibility. Keep the lens clean and use your mirrors.
Can You Keep the Camera On While Driving?
Yes, some systems support full-time rear viewing. The camera needs the correct power and monitor setup. Check the product’s instructions before wiring it for continuous use.
Does a Backup Camera Replace Your RV Mirrors?
No, cameras add another view around your RV. Mirrors still help you watch both sides. Always check your surroundings before moving or backing up.