
An enclosed trailer backup camera helps you see what’s hidden behind solid trailer walls. Choose a clear rear view, strong signal, safe mount, and dependable power. Test the full setup before you drill holes or hit the road.
Picture backing a cargo trailer toward a narrow storage unit. Your mirrors show the doors, but not the low curb behind them. You inch backward, then stop because the gap looks too close. A rear camera shows that hidden space before you move.
Why Does Your Enclosed Trailer Need a Rear Camera?
Your tow vehicle’s camera usually shows the trailer hitch, not the road behind. Tall walls hide people, posts, and parked cars directly behind the trailer. Side mirrors remain vital, yet they cannot show every rear blind spot. A camera adds one view, not a full safety check.
The best setup depends on how you tow and park. Long haulers need more planning for wiring and signal strength. These tips help you avoid needless features.
Tip 1: Match Camera Coverage to Your Trailer and Driving Needs
Before comparing screens, think about your toughest parking spot. Is it a steep driveway, tight yard, or busy loading dock? That tells you which blind area matters most. Start there rather than buying the kit with the most cameras.
Measure from the planned rear mount to your tow vehicle’s dashboard. That span matters for both wireless range and wired cable length. Leave cable slack for sharp turns at the hitch.
Use these needs to shape your choice:
- Small cargo trailer: Start with one rear view for tight parking.
- Long car hauler: Check the full video path before choosing wireless.
- Worksite trailer: Watch rear corners near tools, loaders, and parked vehicles.
- Frequent towing: Consider a system with a live view while driving.
A second camera makes sense when one view misses something important. A side view may help near a narrow gate. Match every new view to a clear driving need.
Tip 2: Test Wired and Wireless Signals Around Metal Walls
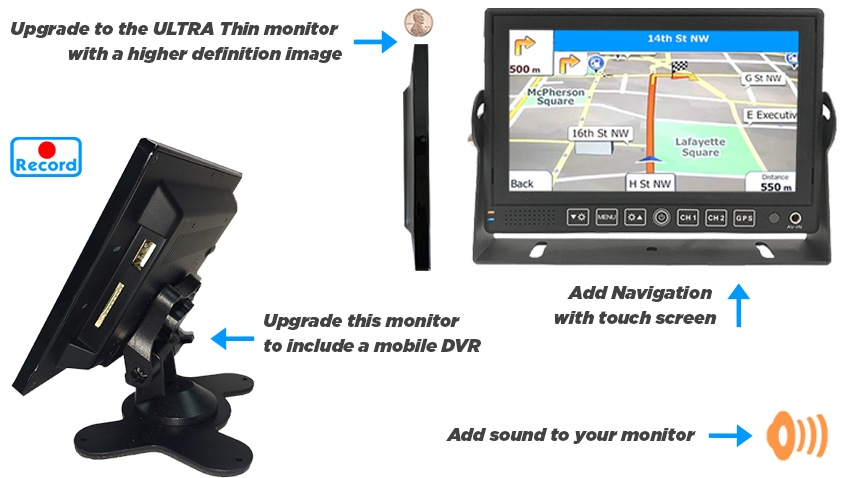
An enclosed trailer backup camera needs a steady picture, not just long-range claims. Metal siding can block or weaken wireless signals from some systems. An inside transmitter may struggle to reach your dashboard. Test reception with the trailer hitched before making permanent changes.
Wired systems carry video through a physical cable instead. They avoid wireless video interference but need a safe cable route. Protect the link between truck and trailer. Your best choice depends on how often you hitch up.
Here is a quick way to compare them:
- Wireless video: Less video cable, but test signal near metal walls.
- Wired video: Stable cable connection, but more routing work is needed.
- External antenna: May help compatible wireless kits clear a metal wall.
- Quick disconnect: Useful when you switch between trailers or tow vehicles.
A real owner shared a helpful example on the AACA towing forum. He fitted a TadiBrothers wireless camera to a 20-foot aluminum car hauler. He mounted its antenna outside the metal body for better reception. His experience may differ from yours.
For basic rear viewing, explore the TadiBrothers wireless camera and seven-inch monitor. The listed kit supports up to two camera inputs. Its stated wireless range is 70 feet under suitable conditions. Always test that range with your own truck and trailer.
Tip 3: Mount Your Enclosed Trailer Backup Camera Above the Doors
A poor mounting spot can waste a good camera. High mounting often gives you a better view of the backing path. But a camera aimed too high may miss a short post. Test the angle before fixing the bracket.
Swing doors and ramp doors need different clearance checks. Swing doors must open without hitting the camera or cables. Check ramp movement before settling on a spot.
Check these details at the rear of your trailer:
- Centered view: Aim for balanced coverage across the backing path.
- Nearby ground: Keep low barriers visible near the bumper.
- Door clearance: Leave room for hinges, latches, and ramp movement.
- Firm mount: Use hardware suited to the trailer’s wall structure.
- Dry connections: Protect cable openings from rain and road spray.
Do you need to drill through the rear wall? First, inspect the panel and any hidden wiring behind it. Avoid cutting into frame parts without an approved mounting plan. Ask an installer when the structure is unclear.
Then test the view with cones at several distances. A wide lens may make close objects look farther away. This reveals what the picture truly shows. Use mirrors and a walkaround as well when backing.
Tip 4: Choose Power That Fits When You Need the Picture
An enclosed trailer backup camera cannot help when it has no power. Some kits switch on when you select the reverse. Others can show a live rear view while you tow. Your viewing mode affects the power source.
A reverse-light feed may suit drivers who only need parking help. A suitable steady power feed may support live viewing during travel. Running lights may not always be powered. Check each circuit before you connect the camera.
Think through these choices before an installer starts:
- Reverse feed: Shows video when the reverse circuit has power.
- Steady feed: Supports live viewing when the circuit stays powered.
- Battery option: May suit temporary setups with regular charging.
- Fuse protection: Match wire and fuse ratings to the actual load.
Never assume all trailers use the same voltage or wire colors. Check the camera manual and your trailer’s wiring plan first. Bad connections can cause blank screens or blown fuses. Ask an installer about unclear circuits.
Tip 5: Check Your Enclosed Trailer Backup Camera in Real Light
Clear video matters most when light or weather changes. Clear daytime images can turn grainy after sunset. Rain, mud, and glare can also hide the curb you need. Judge the full view instead of one number on a box.
A seven-inch monitor may offer a useful view without crowding your dash. Yet size cannot fix poor camera aim. Keep the display within easy sight, but away from road sightlines. Then check how it looks with sunlight through the windshield.
Compare these features with real parking tasks:
- Night view: Check the image near a dim loading dock.
- Lens angle: Look for rear corners without extreme distance distortion.
- Screen glare: Make sure bright light does not wash out details.
- Weather seal: Review the stated protection for outdoor use.
- Image direction: Confirm left and right match your backing needs.
The TadiBrothers wireless rear-view system includes automatic night vision. Its seven-inch display can support a second compatible camera. You can use reverse-triggered or continuous viewing when wired correctly. Confirm kit contents before adding cameras.
Tip 6: Test the Full Setup Before Your First Trip
An enclosed trailer backup camera should work through real towing conditions. Driveway tests may miss signal drops. First, check the image with the trailer fully hitched. Then repeat the test where you normally park and load.
Try a slow reverse in an empty, controlled space. Set cones behind the trailer and watch what appears onscreen. Keep bystanders clear while testing the view. Never rely on the screen as your only safety check.
Make these checks part of your routine:
- Before leaving: Clean the lens and confirm the image appears.
- During setup: Test wireless reception with the engine running.
- After hitching: Check cable slack and connector security.
- After rain: Look for water near plugs and mounting holes.
- After repairs: Test the camera again before normal use.
What if the monitor shows a black screen? Check camera power, monitor input, and pairing before moving wires. A weak picture may point to a poor antenna location. Fix the cause before counting on the view.
Which TadiBrothers Setup Makes Sense for Your Trailer?
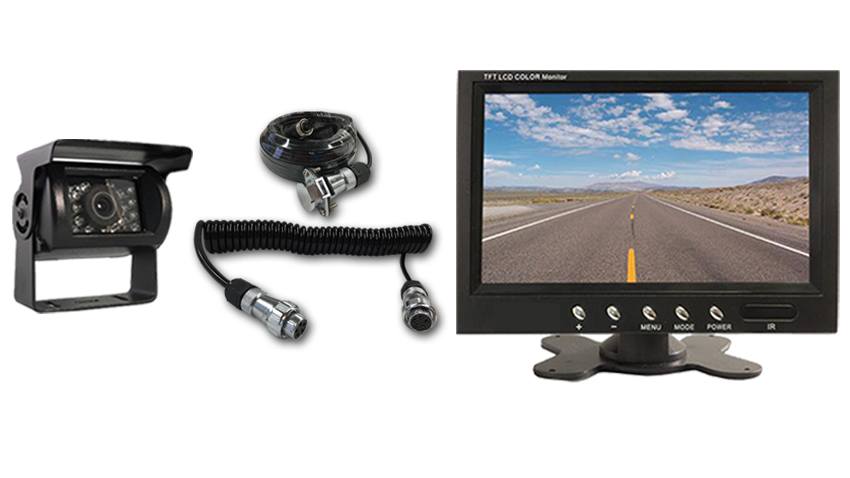
Start with the kind of driving you do most. If you want simpler video routing, consider a wireless kit. If you prefer a physical link, a wired kit may suit you. Check fit and power before choosing.
The TadiBrothers quick-disconnect wired camera kit includes a seven-inch monitor. Its coiled connector makes trailer hitching and unhitching more convenient. The bundle includes a rear camera with automatic night vision. Check cable length and connector placement before ordering.
You can also browse TadiBrothers camera systems for more choices. Compare what’s inside each kit, not just the headline features. Check extras needed for your trailer. Choose a setup that’s easy to use.
Make Your Next Tight Backing Job Easier
Choose your enclosed trailer backup camera around the spots you cannot see. Test signal, mounting, power, and image quality before buying more features. Keep your mirrors, walkarounds, and safe backing habits in the plan. When you reach the next tight loading dock, what will still be hidden?
Product details and the owner’s installation example were checked against the official TadiBrothers listings and the published forum discussion.
Frequently Asked Questions
Where Should You Mount a Camera on an Enclosed Trailer?
A high, centered rear mount is often a useful starting point. The final spot depends on swing doors, ramps, and nearby hardware. Test the ground view and door clearance before drilling.
Will a Wireless Camera Work Through Aluminum Walls?
Metal can weaken a wireless feed from some camera systems. An outside antenna may help if your kit supports one. Test the setup with the trailer hitched before committing.
Can an Enclosed Trailer Backup Camera Stay On While Driving?
Yes, some systems support a live view during travel. They need suitable power and a compatible display. Confirm the mode before you finish wiring.
Does One Camera Show Every Blind Spot?
No single view covers every area around a trailer. One rear camera may be enough for your main backing task. Add another view only when it solves a real gap.