
Most parking damage happens at under 5 mph. Not 30 mph. Not in a highway incident. Five miles per hour, in a car park, while you were looking in the wrong mirror. A car proximity sensor exists specifically for that moment, and the fact that most cars either come with them or can have them added is the part people often discover right after the dent.
Understanding how these sensors work makes it easier to use them properly, maintain them, troubleshoot them when something feels off, and choose the right setup if you’re adding them aftermarket. None of it is complicated once someone explains it without the engineering textbook.
There are five main types of proximity sensors used in modern cars and they all operate on different principles. Some are in your bumper right now. Some are behind your front grille managing your adaptive cruise control. Some are reading lane markings while you drive on the highway. This guide covers how each one works, where it lives in your car, and what it’s actually doing when it does its job. TadiBrothers’ parking sensor range covers the aftermarket end of this, but the technology explanation comes first.
Why 25% of Parking Damage Happens at Under 5 mph
The number sounds implausible until you think about the geometry of modern vehicles. Longer bumpers. Taller hoods that cut off forward visibility. Rear pillars that create blind spots large enough to hide a small car. A reversing camera helps, but cameras require you to be looking at them. A proximity sensor beeps whether you’re looking at the screen or not.
The scenarios that cause the damage are mundane almost every time. Inching back into a tight parallel park. Reversing out of a supermarket space without noticing the shopping cart someone left behind. Pulling into a garage where the depth perception on the right side is genuinely ambiguous. These aren’t dramatic accidents. They’re the minor collisions that happen to experienced drivers in familiar situations.
The average rear-end parking repair costs between $300 and $1,500 depending on where the damage is and what material the bumper is made of. A complete aftermarket sensor kit costs a fraction of that. The calculation is not a close one.
How Do Car Proximity Sensors Work? The Plain Version
The bat analogy is the right one here and it’s not an exaggeration. Bats navigate in complete darkness by emitting sound pulses, listening for what comes back, and building a real-time map of the space around them from the echo timing. Ultrasonic parking sensors work on exactly the same principle.
Each sensor in your bumper contains a small transducer. When the system activates, usually when you put the car in reverse, the transducer fires pulses of ultrasonic sound outward. Those pulses travel through the air at roughly 343 metres per second. When they hit something solid, a wall, a post, another bumper, they bounce back. The sensor catches the returning echo and a small processor calculates how long the round trip took. That time converts directly to distance. Shorter trip equals closer object equals faster beep.
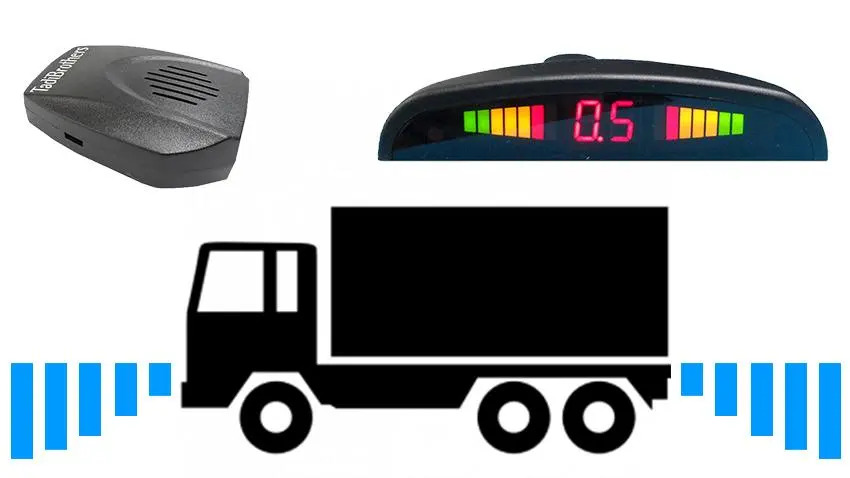
On TadiBrothers’ parking sensor systems, the alert starts at 8 feet out and escalates through six stages before reaching a flat continuous tone at 6 inches from contact. That six-stage progression matters. It gives you precise real-time feedback rather than a single warning at the last moment, which is the difference between a gentle correction and a last-second brake press.
| Ultrasonic sensors handle rain and light fog well because sound waves aren’t significantly affected by moisture. The main weather issue is ice or packed mud on the sensor face, which physically blocks the outgoing pulse. If your sensors seem erratic in winter, clean the faces before assuming the sensor itself has failed. |
5 Types of Car Proximity Sensor Compared
Not all proximity sensors work the same way, and the type your car has depends on what it was built for. Parking sensors and blind spot monitors are completely different technology serving completely different purposes. Here’s how each category works.
| Sensor Type | How It Works | Detection Range | Where You Find It in a Car |
| Ultrasonic | Sound wave echo timing | Up to 8 feet | Rear / front parking bumpers |
| Electromagnetic | Field disturbance | Up to 6 feet | Bumper strip systems, no-drill |
| Infrared | IR light reflection | Up to 3 feet | Interior: doors, smart entry |
| Radar (mmWave) | Radio wave reflection | Up to 200+ feet | Blind spot, ACC, AEB, lane assist |
| Camera-based | Computer vision + AI | Variable | 360-degree surround view systems |
1. Ultrasonic Sensors
The workhorse of automotive proximity detection. Ultrasonic sensors use high-frequency sound pulses, typically above 20kHz, so inaudible to human ears, to measure distance to nearby objects. They detect metallic and non-metallic objects equally, which is why they work well in parking situations where you might back into a concrete bollard, a plastic recycling bin, or another car with equal reliability. They’re robust, relatively inexpensive, and well-suited for the short-range detection that parking requires.
Most aftermarket parking sensor kits use ultrasonic sensors. They require small holes drilled into the bumper for mounting, the sensors paint-matched to your bumper colour, and connection to a control box that manages the alert system. The installation is within DIY capability for most people and doesn’t require dealer programming.
2. Electromagnetic Sensors
Electromagnetic parking sensors create a continuous field that extends around the bumper rather than pulsing outward. An object entering the field causes a measurable distortion, which triggers the alert. Because they work as a strip embedded along the bumper rather than individually drilled sensors, they’re a popular choice for vehicles where drilling holes would be difficult or undesirable. They also tend to offer wider coverage without dead zones between individual sensor positions.
The trade-off is slightly less precise distance feedback compared to a well-positioned ultrasonic array and a generally shorter detection range. For close-range parking assistance, both technologies get the job done. The choice usually comes down to installation preference.
3. Infrared Sensors
Infrared sensors emit a beam of IR light and measure the time and intensity of the reflection that comes back. They’re simpler in design than ultrasonic systems, which makes them less expensive, but they’re more sensitive to environmental conditions. Bright sunlight, highly reflective surfaces, and certain materials can confuse an infrared sensor in ways that don’t affect ultrasonic detection.
In automotive use, infrared sensors appear more in interior and entry applications than in parking systems. Keyless entry systems that detect your hand approaching the door handle, touchless trunk releases, and some interior presence detection systems use infrared. For rear parking detection in outdoor conditions, ultrasonic is more reliable.
4. Radar Sensors (Millimetre-Wave)
Radar proximity sensors send radio waves rather than sound or light. The detection principle is the same: emit a signal, measure the echo, calculate distance. But radar operates at much greater range than ultrasonic or infrared, can detect objects through rain and fog without degradation, and can track the velocity of detected objects, not just their distance.
This is the technology behind your adaptive cruise control, blind spot monitoring, automatic emergency braking, and rear cross-traffic alerts. Millimetre-wave radar sensors typically sit behind the front grille and embedded in the rear quarter panels, working continuously at highway speed to manage the gaps between you and other moving vehicles.
5. Camera-Based Proximity Detection
Cameras aren’t proximity sensors in the traditional sense, but modern camera systems paired with computer vision software identify objects, estimate distances, and flag hazards in ways that function as proximity detection. The most capable systems combine camera feeds with ultrasonic and radar layers to build a 360-degree view of the space around the vehicle, differentiating between a pedestrian, a traffic cone, and a parked car and responding appropriately to each.
Entry-level camera systems show you an image and leave the distance judgment to you. Better ones overlay coloured grid lines calibrated to real distances. The best ones fuse camera data with active sensor arrays to create something that genuinely sees the car’s surroundings rather than just showing a picture of them.
The Sensors Already in Your Car: ADAS and What’s Actually Running
Most drivers with a car built after 2018 already have multiple proximity sensors running at any given moment. They just don’t think of them that way. Every ADAS feature, adaptive cruise control, blind spot monitoring, lane departure warning, automatic emergency braking, is built on proximity sensor technology. The parking sensor in your bumper and the radar module behind your grille are variations on the same concept.
Understanding what sensor type is behind each feature makes it easier to understand why these systems behave the way they do, and why a dusty grille or a sensor blocked by a tow hitch mount can cause adaptive cruise to behave strangely.
| ADAS Feature | Sensor Type Behind It | What It’s Actually Doing |
| Parking sensors | Ultrasonic | Pulsing sound, measuring echo time |
| Blind spot monitoring | Radar | Scanning adjacent lanes at highway speed |
| Adaptive cruise control | Radar | Maintaining distance from the car ahead |
| Automatic emergency braking | Radar + camera fusion | Detecting collision threat, pre-charging brakes |
| Rear cross-traffic alert | Radar | Watching for crossing traffic while reversing |
| Lane departure warning | Camera-based | Reading lane markings, flagging drift |
| Surround view / 360 cam | Camera + ultrasonic fusion | Building composite overhead view |
The reason this matters practically: if your adaptive cruise suddenly stops working correctly, or your blind spot monitor stops alerting, the cause is often a blocked sensor rather than a failed module. Radar sensors behind the front grille can be obscured by grime, ice, or aftermarket accessories. Camera-based systems get confused by dirty lenses. A lot of what looks like a sensor fault is a sensor that can’t see properly.
What Every Beep Pattern Actually Means
The beep isn’t one thing. It’s a distance readout in audio form, and the progression from slow to continuous is giving you real-time distance information if you know how to read it. Most people learn this from experience rather than from any guide, which is why so many drivers respond only to the flat tone rather than to the earlier stages where the correction is much easier to make.
| Beep Pattern | Distance Approx. | What It’s Telling You |
| Slow intermittent | 6 to 8 feet | Something’s there. Keep watching. |
| Medium beeping | 3 to 5 feet | Getting close. Ease off the throttle. |
| Rapid beeping | 1 to 2 feet | Very close. Stop now or go slowly. |
| Continuous flat tone | Under 6 inches | Contact range. Stop immediately. |
| No sound at all | Clear zone | Nothing detected, or sensor has a fault |
TadiBrothers’ dual sensor systems use six alarm stages between 8 feet and contact. Most basic kits use three or four. The extra stages give you more time to react at each distance bracket rather than jumping from ‘far’ to ‘very close’. In a tight parallel park where the difference between correct and too-close is measured in inches, those extra stages make a noticeable difference. See the full range at Tadibrothers.
How to Test Your Car Proximity Sensor at Home
You don’t need a dealer visit or specialist equipment to check whether your sensors are working. If the sensor is functioning, this takes about three minutes. If the sensor is failing, this tells you exactly which one.
- Find a clear, empty space and put the car in reverse. Listen for the initial slow beep at around 8 feet. If nothing beeps, check the fuse box for the sensor system fuse before assuming the sensor itself has failed.
- Slowly back toward a solid object like a wall or a garage door. Watch and listen as the beep should accelerate through the stages. If it jumps from slow to flat tone without the middle stages, one or more of the middle-distance sensors may have a fault.
- Walk around to the bumper and look at each sensor face individually. Press a finger lightly against each sensor one at a time while someone listens from inside. A functioning ultrasonic sensor produces a slight buzzing sensation when active. One that doesn’t respond while others do is the candidate for cleaning or replacement.
If step three identifies a dead sensor, clean the face thoroughly with a damp soft cloth before ordering a replacement. Packed grime or ice is the most common cause of individual sensor failure and a clean can restore function without any part replacement.
Cleaning and Maintaining Your Car Proximity Sensors
Proximity sensors are low-maintenance by design. They have no moving parts and they’re built to handle weather, dust, and car wash spray. But they do need occasional attention, and the kind of attention they need is simple enough that most people put it off indefinitely and then wonder why the sensors are behaving strangely.
The sensor face is the only part that needs regular cleaning. Road grime, tar, dried insects, ice, and accumulated dust can all reduce or completely block detection without triggering any warning light. The sensor is still technically active. It just can’t see through what’s covering it.
- Clean sensor faces every 2 to 3 months or after heavy off-road or winter driving. Use a soft cloth dampened with soapy water. Avoid abrasive materials.
- In winter, check for ice on sensor faces before relying on the system. A few seconds with a soft cloth removes the ice that causes false readings.
- Avoid high-pressure washer jets aimed directly at sensor faces. From a normal car wash distance this isn’t a problem, but direct targeted pressure can force water into the sensor housing.
- After any rear bumper impact, inspect all sensor faces for cracks. A hairline crack in the housing allows moisture in and can cause progressive failure over weeks or months.
- Check sensor wiring connections annually if the car is more than 5 years old. Connector corrosion is a more common cause of sensor failure in older vehicles than the sensor itself.
OEM vs Aftermarket: Real Cost Comparison for 2026
The price difference between OEM and aftermarket proximity sensors is significant, and the performance difference is much smaller than the price gap would suggest. Understanding the numbers before you call a dealer saves a lot of money.
| Option | Per Sensor Cost | Full System Cost | Install Cost |
| OEM dealer replacement | $150 to $400 | N/A (per sensor) | $100 to $300 labour |
| Independent mechanic (OEM) | $80 to $200 | N/A (per sensor) | $60 to $150 labour |
| Aftermarket kit (4-sensor) | $8 to $25 | $30 to $80 kit | $0 if DIY |
| Aftermarket kit (8-sensor) | $8 to $25 | $50 to $120 kit | $0 if DIY |
| TadiBrothers complete system | Included in kit | Kit pricing online | $0, all hardware included |
The main practical advantage of OEM replacement sensors is seamless integration with your car’s factory display and system calibration. If your car has a colour-coded distance display on the infotainment screen, an OEM replacement sensor maintains that integration without additional configuration.
Aftermarket systems have their own display and speaker, which means they’re independent of the factory system and work regardless of whether your car originally had sensors. For vehicles without factory sensors, aftermarket is the only option. For vehicles with failed factory sensors, the aftermarket kit often costs less than a single OEM replacement sensor and gives you the same detection capability.
The installation question is usually the real decision point. OEM sensors at a dealer require programming and calibration that can’t be done at home. Aftermarket kits like those from TadiBrothers include everything in the box, sensors, control box, display, speaker, hole saw, and full cabling, and installed without dealer equipment. Most installs take two to three hours.
Common Failures and What They’re Actually Telling You
Sensor problems usually announce themselves clearly, but the symptom doesn’t always point directly to the cause. Before replacing a sensor, work through the likely causes in order from simplest to most complex.
- Constant beeping with nothing nearby. Start with the sensor face. Clean it. If the beeping continues on a clear road with a clean sensor, check for a hairline crack in the housing. A cracked sensor reads the housing itself as an object.
- No beeping when you reverse. Check the fuse first. Then check the connection between the sensors and the control box. A loose connector causes complete system failure more often than a dead sensor.
- Only some sensors beeping, not others. Run the three-step home test above. An individual dead sensor usually means a dirty face, a broken housing, or a wiring fault at that specific sensor connection.
- Inconsistent detection, working sometimes and not others. Temperature-related issues, moisture getting into a sensor housing, or an intermittent wiring fault. In cold climates, check whether the inconsistency correlates with overnight temperature drops.
- ADAS features stopping randomly (blind spot, cruise, AEB). Check for anything covering the radar sensors. Aftermarket accessories mounted near the front grille, trailer hitches blocking rear sensors, or ice accumulation behind a front licence plate frame all cause this.
Proximity sensors are one of those car technologies that seem obvious in retrospect, the kind of thing that’s genuinely useful every time you use it and genuinely regrettable the one time you didn’t have it. The fact that they can be added to almost any vehicle for less than the cost of a single body shop visit makes the decision fairly straightforward.
Whether you’re trying to understand what the sensors in your current car are actually doing, troubleshooting one that’s behaving strangely, or figuring out what to add to a car that never had them, the technology is simpler than it looks from the outside. TadiBrothers’ parking sensor range is a practical starting point for the aftermarket end of it.
Here’s the question worth sitting with: when did you last actually check whether your parking sensors are clean and fully functional? Because most people find out they weren’t in a car park, at walking speed, with a witness.
FAQs
1. How do car proximity sensors work in basic terms?
Most use ultrasonic sound pulses. The sensor fires a pulse, the pulse bounces off a nearby object, the sensor measures how long the round trip took, and a processor converts that time into a distance. Shorter trip equals closer object equals faster beep. The system activates when you shift into reverse and deactivates when you pull forward.
2. Can I add proximity sensors to a car that didn’t come with them?
Yes. Aftermarket kits are designed exactly for this. TadiBrothers’ parking sensor kits include all hardware, mounting tools, a display, and speaker, and install without dealer programming. Most installs take two to three hours with basic tools.
3. Do proximity sensors work in rain or fog?
Ultrasonic sensors handle rain and fog well because sound waves aren’t significantly disrupted by moisture. Radar sensors used in ADAS features are even less affected by weather. The main weather issue for ultrasonic parking sensors is ice or compacted snow on the sensor face, which physically blocks the outgoing pulse.
4. Why does my parking sensor keep beeping when nothing is there?
Most commonly a dirty or cracked sensor face. Clean the face with a soft cloth first. If the false alarm continues, inspect for a hairline crack in the housing. A cracked sensor reads part of the bumper or its own housing as a nearby object and beeps continuously as a result.
5. What’s the difference between parking sensors and ADAS radar sensors?
Parking sensors use ultrasonic technology for short-range detection, typically 8 feet or under, and activate when you reverse. ADAS radar sensors use millimetre-wave radio waves for long-range continuous detection at highway speed, managing adaptive cruise, blind spot alerts, and emergency braking while you drive forward. Same general principle, completely different technology and application.
6. How much does it cost to replace a proximity sensor?
OEM dealer replacement runs $150 to $400 per sensor plus labour. Independent mechanic with an OEM part runs $80 to $200 plus labour. A full aftermarket 4-sensor kit runs $30 to $80 total with no labour cost if you install it yourself. A full 8-sensor kit with display and speaker runs $50 to $120. The performance difference between a properly installed aftermarket kit and an OEM replacement sensor in everyday parking is minimal.
7. Is it worth adding sensors to an older car?
If the car doesn’t have factory sensors and you park in tight spaces regularly, the answer is usually yes. The cost of a quality aftermarket kit is less than one moderate parking collision repair. The installation doesn’t require a dealer, and the system works independently of any factory electrical system.